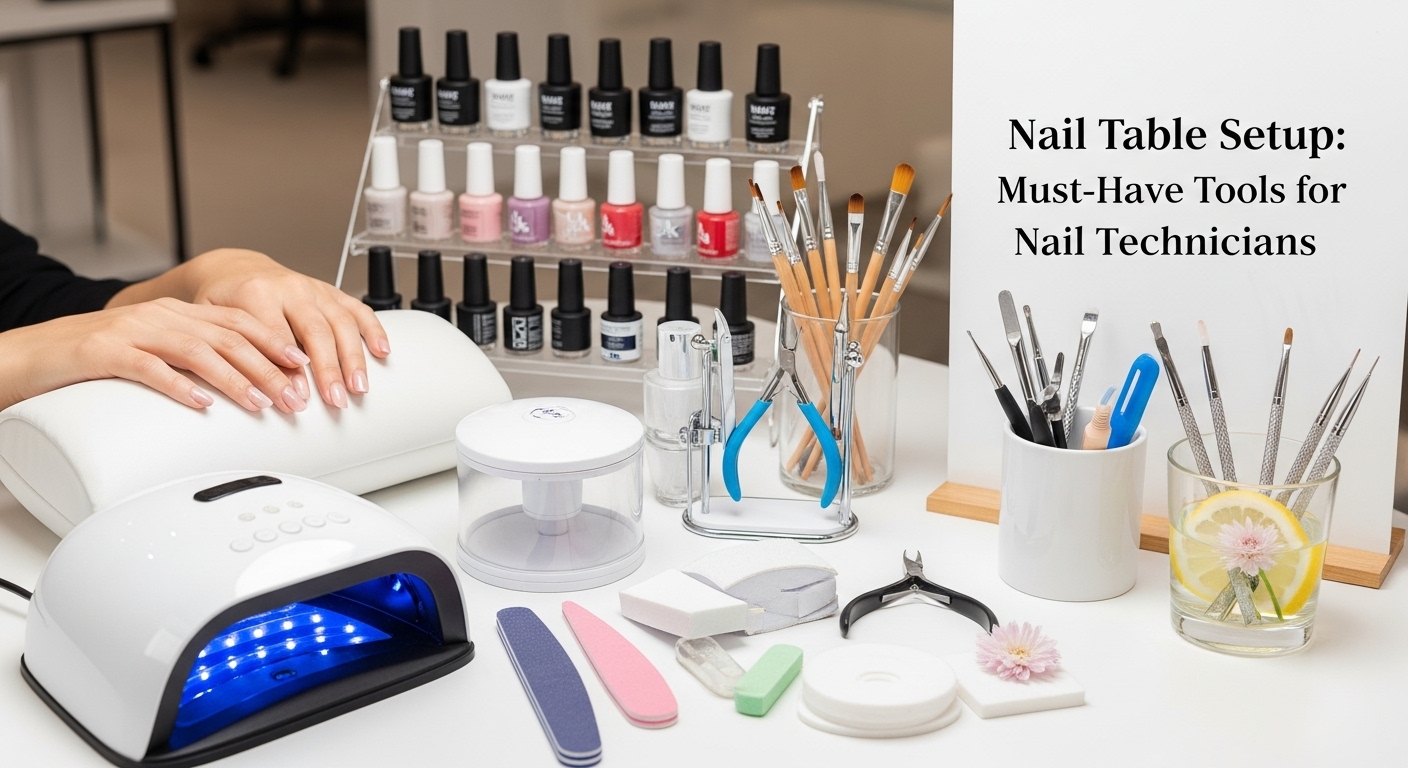
Nail technicians in South Africa spend most of their day helping clients feel confident and look polished. A big part of that work happens on the nail table – the core of every salon. Set it up right and you’ll trim, file, shape, and colour nails with ease and safety. Set it up wrong and you risk messy surfaces, awkward angles, and a slower workflow. The tools you keep at hand are the secret weapons that make the job smooth, efficient, and enjoyable for both you and your clients.
Why a well‑prepared nail table matters
A solid table gives you a clean, flat surface for precise work.
It keeps nail products visible and within reach, reducing the time you spend walking back for the next bottle.
A tidy setup reduces clutter and the chance of small tools slipping onto the floor – something that can be a slip‑and‑fall hazard, especially in busy salons.
Finally, a professional‑looking table can boost a client’s confidence right from the moment they sit down.
Core tools every nail tech should keep on the table
| Tool | What it does | Approx. price (R) |
|---|---|---|
| Nail file set (1‑2 mm to 6 mm) | Shape and smooth nails | 128 – 256 |
| Cuticle pusher & nippers | Remove dead skin | 58 – 120 |
| Nail buffer block | Add polish shine | 85 – 150 |
| Base coat & top coat bottles | Protect and seal | 150 – 300 each |
| Colour set (12‑20 shades) | Artistic expressions | 840 – 1 680 |
| UV/LED lamp (30 W) | Cure gel polish | 600 – 1 200 |
| Disposable nail tips | Create longer nails | 40 – 60 per box |
| Tweezers & manicure clip | Precise trimming | 28 – 80 |
| Cleaning wipes & sanitiser | Hygiene | 38 – 75 |
| Light‑table lamp | Inspect polish or gel | 300 – 600 |
The prices above reflect what you’ll find in major South African supermarkets, beauty stores or online. If you’re just starting, you can mix a few basic items with some high‑end alternatives as you grow.
Building the table: a step‑by‑step look
- Choose a stable surface – a standard 90 cm × 18 cm desk works fine.
- Add a split‑ring or full‑round mat – they protect from sharp nails and help you keep tools organized.
- Insert a power strip – most lamps and sanitiser bottles need electricity.
- Place the UV/LED lamp on a separate shelf so it doesn’t overload the main table.
- Arrange your items in order of frequency: files and buffers first, followed by tips, colour bottles, and the base/top coats.
- Leave a small area for a client – they’ll appreciate a clean space for their hands.
Keep the cabinet without a top so you can reach the table easily. If you have extra room, add a small shelf for cleaning wipes and a bottle of hand cream.
Smart ways to outfit your nail table on a budget
- Buy in bulk – many suppliers offer 50‑piece bundles of files or buffers that cost less per piece.
- Check local discount shops – they often have great deals on nippers and disc cutters.
- Swap versus buy – you can trade half‑price used echo‑spices with another tech or buy from second‑hand retailers.
- Use multipurpose tools – a quality nail clipper can double as a small file for quick touch‑ups.
- Renew and repair – polish old files instead of buying new ones; a fresh coat of nail polish can keep a file sharp.
These small changes add up to a significant savings over time.
Keeping tools safe and clean
A tidy table doesn’t just look nice – it keeps you and your clients safe.
After each client, wipe down the table with a disinfectant wipe.
Store knives, scissors, and other sharp pieces in a lockbox or container with a lid.
Wash frequently used items – for example, rinse the color bottles twice a day to avoid build‑up.
Make a habit of reheating the UV/LED lamp when it’s cold; this prolongs life and saves on electricity.
With a clear plan for arranging, shopping, and cleaning, you’ll have a nail table that works as hard as you do.
Enjoy the freedom of working with a setup you trust, and watch your client satisfaction grow – and your earnings, too.