Ever wanted a fancy nail design without spending hours at a salon? Nail art stickers are a quick fix that can turn your hands into a masterpiece in minutes. The trick is to use the right prep, a steady hand, and a few simple steps. Below you’ll find a clear recipe that anyone can follow – even if you’ve never painted a nail before.
What you’ll need
| Item | Why it matters | Where to find it in South Africa |
|---|---|---|
| Nail tip remover (acetone‑based) | Removes old polish and dries the nail | Pick Your Style, MSA, or Woolworths |
| Washcloth or cotton pad | Lets you clean the nail surface | Local pharmacies & supermarkets |
| Nail scrubber or buffer | Gently removes shine and smooths the nail | Beauty shops, online stores |
| Tiny brush or cotton stick | Helps spread silicone sealants or a little glue | MSA, Pick Your Style |
| Nail stickers (your favourite design) | The design you love | MSA, online art supply shops |
| Optional: clear top‑coat | Locks the sticker in place | Pick Your Style, Woolworths |
Step 1. Clean the canvas
- Remove any polish – Wet a cotton pad with acetone and rub over the nail until all clear polish is gone.
- Wash – Clean up with soap and water; dry with a clean towel.
- Buffer – Give the nail a light buff to remove shine. Too shiny and the sticker won’t stick.
Step 2. Pick the right spot
- Stick the sticker to a flat, dry area. Avoid the cuticle; it can hold oil and break the bond.
- If the sticker has a printed side, make sure that side faces the nail.
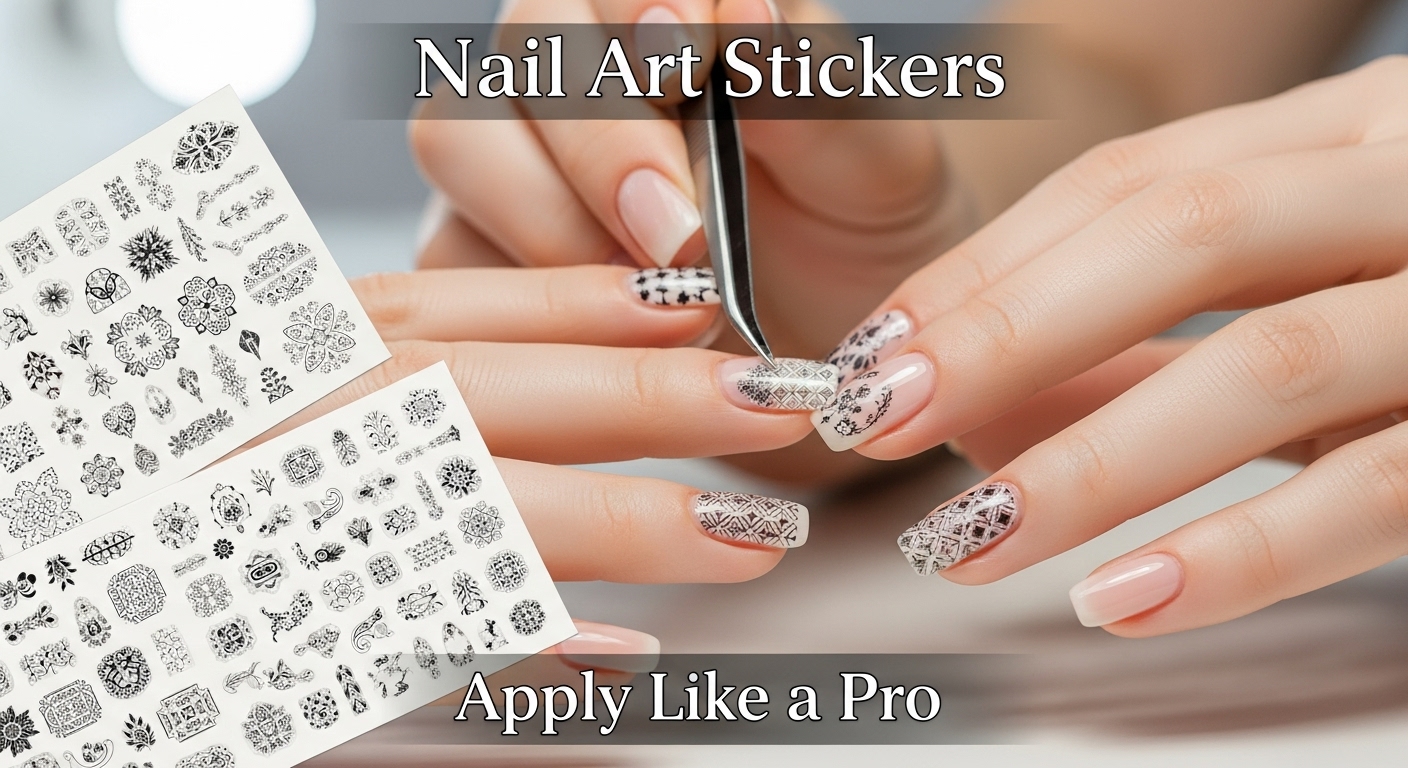
Step 3. Apply the sticker
- Hold the sticker at a 45‑degree angle from the nail.
- Let it drop onto the nail surface and gently press down.
- Use the tiny brush or cotton stick to press from the middle toward the corners, smoothing any air bubbles.
Step 4. Seal it up
- Once the sticker lies flat, apply a light coat of clear top‑coat over the whole nail (and a little on the edges).
- Allow it to dry for 1–2 minutes.
- Repeat for extra durability.
Tips for a flawless finish
| Tip | Why it works | How to do it |
|---|---|---|
| Use a “no‑water” top‑coat | No water will keep the sticker from peeling. | Shake well, dab a tiny drop. |
| Give it a “polish” buff | A few light buffing strokes after the top‑coat finishes can unify the look. | Use a very fine grit buffer. |
| Avoid wet environments | Water or sweat can loosen the bond. | Wear gloves or keep nails dry during early hours. |
| Check the expiration date | Old stickers can be tacky. | Look for dates on the packaging. |
Common questions answered
Yes—if you follow the prep steps and use a top‑coat, many nail stickers stay intact for up to 10 days. Wash your hands gently and avoid heavy hand‑washing for the first 12–24 hours.
Gently press it out with a small brush or the tip of a toothpick. If it’s stubborn, pop and replace the sticker.
Not always. A clear top‑coat is enough for a fresh finish. If you want extra shine, you can apply a very thin layer of nail polish over the top‑coat and let it dry—just make sure the polish is fully cured before picking up your phone.
Absolutely. Just make sure each nail goes through the same prep and sealing process for even results.
What we’ve learned
With the right tools, a clean surface, and a steady hand, nail sticker magic is only a few minutes away. Try a simple “polka dot” or “floral” design first, then experiment with colours that match your style or the season. Remember – practice makes perfect, so grab a spare set of stickers and keep it fun!
Feel free to share your own tips or questions in the comments. Happy styling, South Africa!