Have you ever looked at your nails and thought, “Wow, I wish I could get salon nails without leaving my house”? The good news? You can. With the right nail kit, a little patience, and the steps below, your nails can look just as pretty as the ones done at a salon. And the best part? You don’t need to be a pro. Anyone can do it — even if it’s your first time!
Doing your nails at home saves money, saves time, and you get to choose your own look without waiting in line. Whether you’re getting ready for school, work, or a weekend out, your nails will always be on point. Let’s show you how.
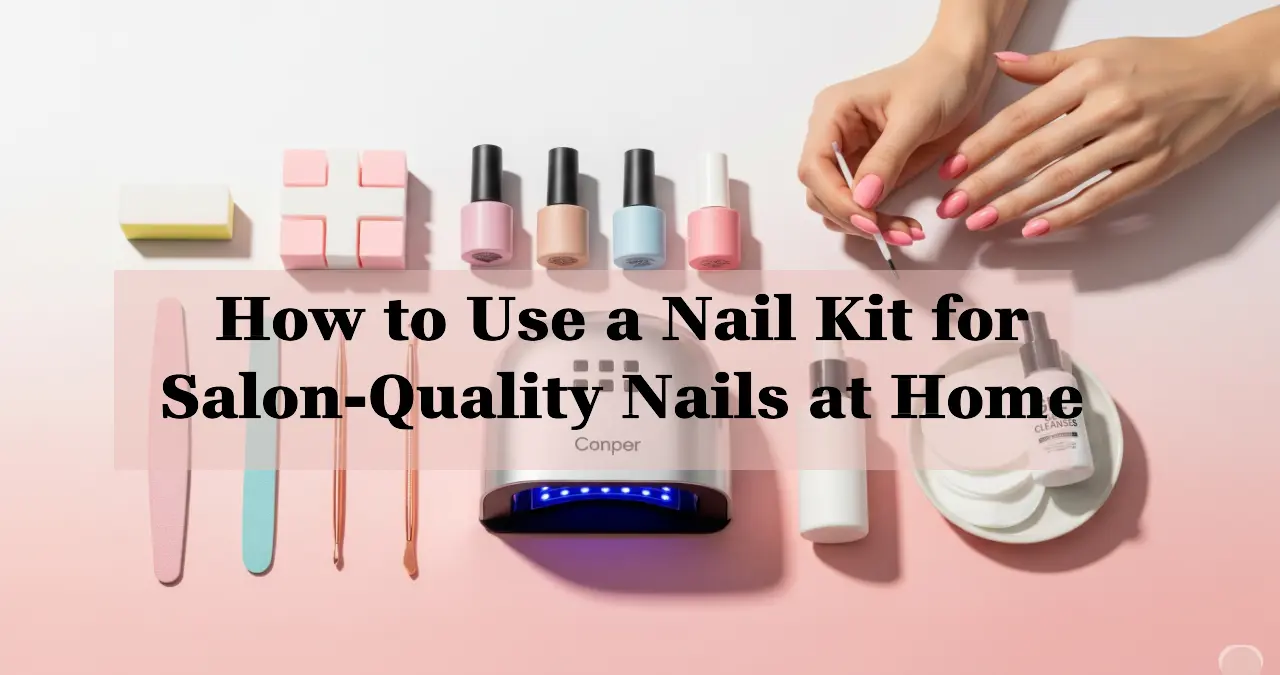
What’s in a Nail Kit?
Before you begin, it’s good to know what’s inside most nail kits. Every tool has a job, and together, they help you get smooth, clean, and beautiful nails. Here’s what you’ll usually find:
- Nail file – to shape your nails
- Buffer block – to smooth the top of your nails
- Cuticle pusher – to gently push back your cuticles
- Nail clippers – to trim long nails
- Base coat – goes on before the color
- Nail polish – your main colour
- Top coat – to add shine and protect the polish
- UV/LED lamp – for drying gel polish (only needed for gel nails)
- Cuticle oil – to keep your nails healthy
Some kits may also have nail tips, glue, stickers, or gems for fun nail art.
Getting Your Nails Ready
To make your nail polish last longer, prep is very important. Think of it like painting a wall — you need a clean surface.
- Wash your hands and clean under your nails.
- Remove old polish if there’s any left.
- Clip your nails if they’re too long or uneven.
- File them into shape – square, round, or whatever you like.
- Buff the top of your nails lightly with a buffer block. This helps polish stick better.
- Push back your cuticles using the cuticle pusher.
- Wipe your nails with a bit of alcohol or polish remover to get rid of oils or dust.
Now your nails are fresh and ready for the fun part.
Step-by-Step Guide: How to Use a Nail Kit at Home
Here’s the easiest way to do your own nails and make them look just like the salon:
1. File and Shape
Shape all your nails the same. Don’t rush — smooth edges help avoid breakage.
2. Buff the Nail Surface
Lightly go over each nail with the buffer block. Not too hard, just enough to smooth the surface.
3. Push Back Cuticles
Gently push them with the cuticle pusher. Don’t cut them — this keeps your nails healthy and helps polish stay on longer.
4. Apply Base Coat
This is your “foundation.” Apply a thin layer and let it dry (or cure if it’s gel).
5. Apply Colour Polish (2 Coats)
Pick your favourite colour and paint a thin layer. Let it dry, then apply a second coat for full colour.
6. Cure Under UV/LED Lamp (for Gel Only)
If you’re using gel polish, place your hand under the lamp to dry each layer. Follow the timing in your kit.
7. Apply Top Coat
This adds shine and protects the colour. Apply a thin layer.
8. Final Cure (for Gel Only)
If you’re doing gel nails, cure the top coat as well. Then wipe with alcohol if your top coat is sticky.
9. Use Cuticle Oil
Rub a little cuticle oil around each nail to keep the skin soft and your nails looking fresh.
Want to see it in action?
Here’s a helpful video showing exactly how to use a gel nail kit—from prepping to curing—just like in step by step tutorial above:
Tips for Long-Lasting Nails
- Buff, but don’t over-buff – just enough to remove shine
- Seal the edges with polish – this helps stop chipping
- Use thin layers of polish – thick coats peel easily
- Invest in good quality polish – it lasts longer and looks better
- Avoid water right after – let your nails fully harden before dishwashing or bathing
Mistakes to Watch Out For
Even pros make mistakes! But you can avoid the most common ones:
- Too much buffing can damage your nails and make them weak
- Thick polish layers take longer to dry and peel fast
- Not curing long enough (for gel) means your polish will be soft and rub off
Go slowly, follow the steps, and your nails will look amazing.
Quick Questions People Often Ask
Once every 1–2 weeks is enough. You can re-do them when polish starts to chip or grow out.
Yes! As long as you follow the instructions and don’t rush. Be gentle and clean your tools after each use.
Regular polish air-dries, and gel polish needs a UV/LED lamp. Gel lasts longer (up to 2–3 weeks) and doesn’t chip easily.
Ready to Try It?
Doing your own nails at home is fun, relaxing, and saves you hundreds over time. You don’t need to be perfect — with practice, you’ll get better each time. Try it out, enjoy the process, and don’t forget to take a photo of your pretty nails and share it with your friends!