Imagine polishing your nails the same way a professional would—hands‑free, flawless shine—while you’re at home in your favourite cape. By learning how to do Gel Nails with a UV Lamp at Home, you turn a quick weekend craft into a regular confidence boost. For many of us in South Africa, visiting a salon can be pricey and ahead of schedule, so mastering a simple, inexpensive set‑up saves money, time, and lets you personalise every detail.
Why the UV bite matters
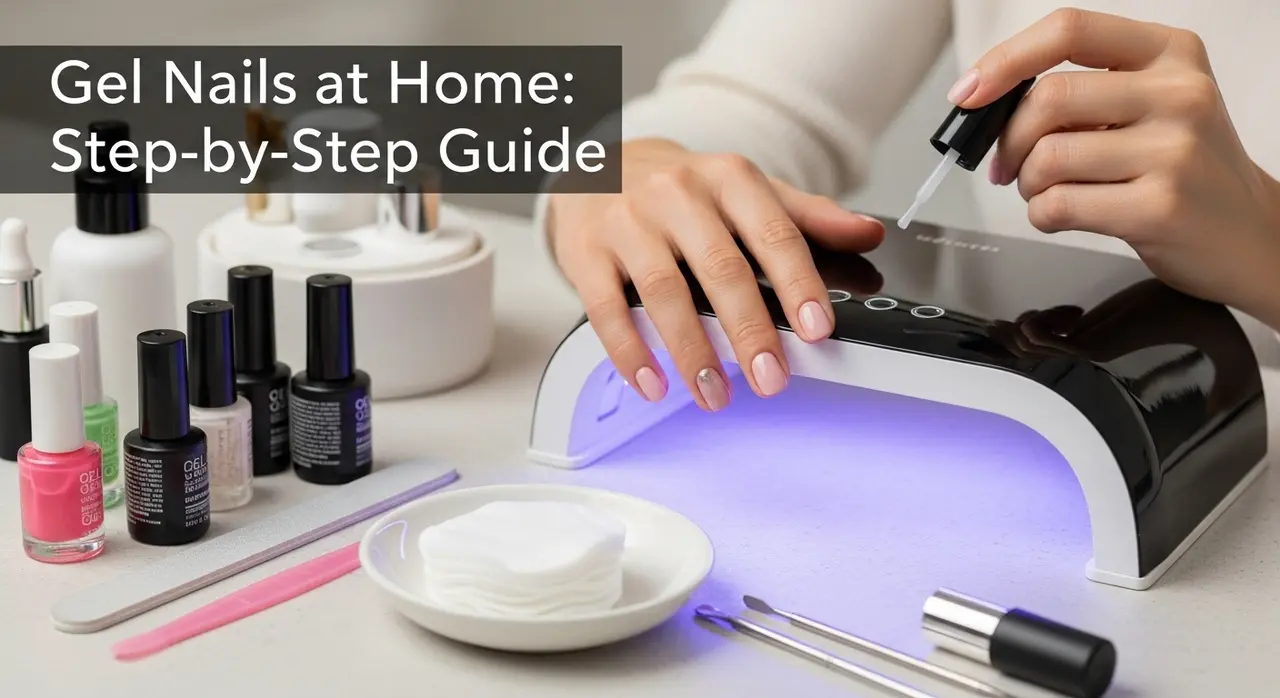
A UV lamp speeds up the polymerisation of gel polish and lifts the top coat into a silky, durable layer. Without it, the polish can run, foam and take ages to dry. In South Africa, a decent stand‑alone UV lamp can be found for between R200 and R350 on eBay or Amazon. Once you’ve made that initial investment, you’ll use it for every nail set thereafter.
The kit you’ll need (all in Rand)
| Item | Cost (approx.) | Where to find it |
|---|---|---|
| 8‑inch UV lamp | R200–R350 | Local beauty supply, online |
| Nail prep kit (trimmer, buffer, cuticle push) | R50–R90 | Department stores |
| Gel nail polish set (base, colour, top) | R20–R40 per bottle | Beauty shops, online |
| Nail polish remover | R15–R20 per bottle | Drugstores |
| UV‐proof gloves | R2–R5 per pair | Pharmacy |
You can keep the kit in a small drawer; it sticks to the wall and the UV lamp sits on the countertop.
Step‑by‑Step in Plain English
Step 1: Nail prep
- Trim and file each nail to your desired shape.
- Push back cuticles with the cuticle push; wipe off any loose debris with a cotton ball dipped in nail polish remover.
- Buff the nail surface lightly—just enough to give the gel a surface to cling to.
- Wipe the nails again with a clean cotton pad; let them dry completely.
Step 2: Base coat
- Drop one or two drops of base gel onto each nail.
- Spread evenly, avoiding the cuticle area.
- Snap the nail down onto the UV lamp (about 30 seconds).
- Repeat the same step for the middle section of the nail, then finish the tip.
Step 3: Colour
- Apply the first thin layer of your chosen colour.
- Cure 30 seconds under the lamp.
- Repeat for a second layer if you need deeper saturation; cure again.
Step 4: Top coat
- Underlay a top coat onto each nail.
- Cure for 30 seconds.
- Vacuum the surface with a disposable pad to remove amber haze.
- If you want a glossy finish, add a second top coat and cure.
Step 5: Finish
- Apply a hydrating hand cream to let your nails rest.
- To remove nails after a few weeks, soak a cotton pad in remover and place it on the nail for 5 minutes (do not peel forced).
That’s all—no chase for a salon, no missed appointments.
Dealing With Common Issues
- Peeling colour – If your colour lifts at the edges, make sure the base is fully cured. Double‑check the UV lamp’s intensity; weak lamps may need a full replacement after a year of use.
- Nail hangnails – Keep a small file handy; gentle filing of the hangnail during the filing step can remove most of them.
- Yellowing – Occasionally apply a quartz silica gel pack to the lamp; this removes moisture that can cause yellow tinting.
Why the DIY route saves money
A colour polish at a salon can easily run R200 per nail, a thirty‑minute session. By buying a UV lamp for R320 and a starter kit for R150, you can treat five nails for under R100 per session. Once you build a library of favourite colours, those initial costs pay for themselves after a handful of weeks.
A quick checklist you can keep
- Nail files ✔︎
- UV lamp ✔︎
- Base, colour, top bi‑weekly ✔︎
- Coupon or reminder to check lamp intensity every 6 months ✔︎
No jargon, no fancy film. Simple, straight‑forward, keeps your nails looking sharp for the next gathering or simply for you to show off during a rainy day.
Feel free to tweak any steps to suit your style. The right rhythm comes after a few tries, and then your home gets its own “nail studio.” Keep experimenting with new shades, overgloss finishes, or graphic accents—because once you have the UV lamp, the only limit is your imagination. Enjoy every glossy touch!