Ever notice how your UV nail lamp starts to flicker or stop working after just a few months? If you’ve seen that happen, you’re not alone. A lot of South African nail lovers end up swapping out their lamps a lot more than they’d like. The good news? Most of the problems can be avoided with a few easy habits. As a Johannesburg salon technician who’s spent over five years polishing polish under every type of lamp, I’m sharing the tried‑and‑true tricks that keep a lamp running bright and safe for years—without breaking the bank.
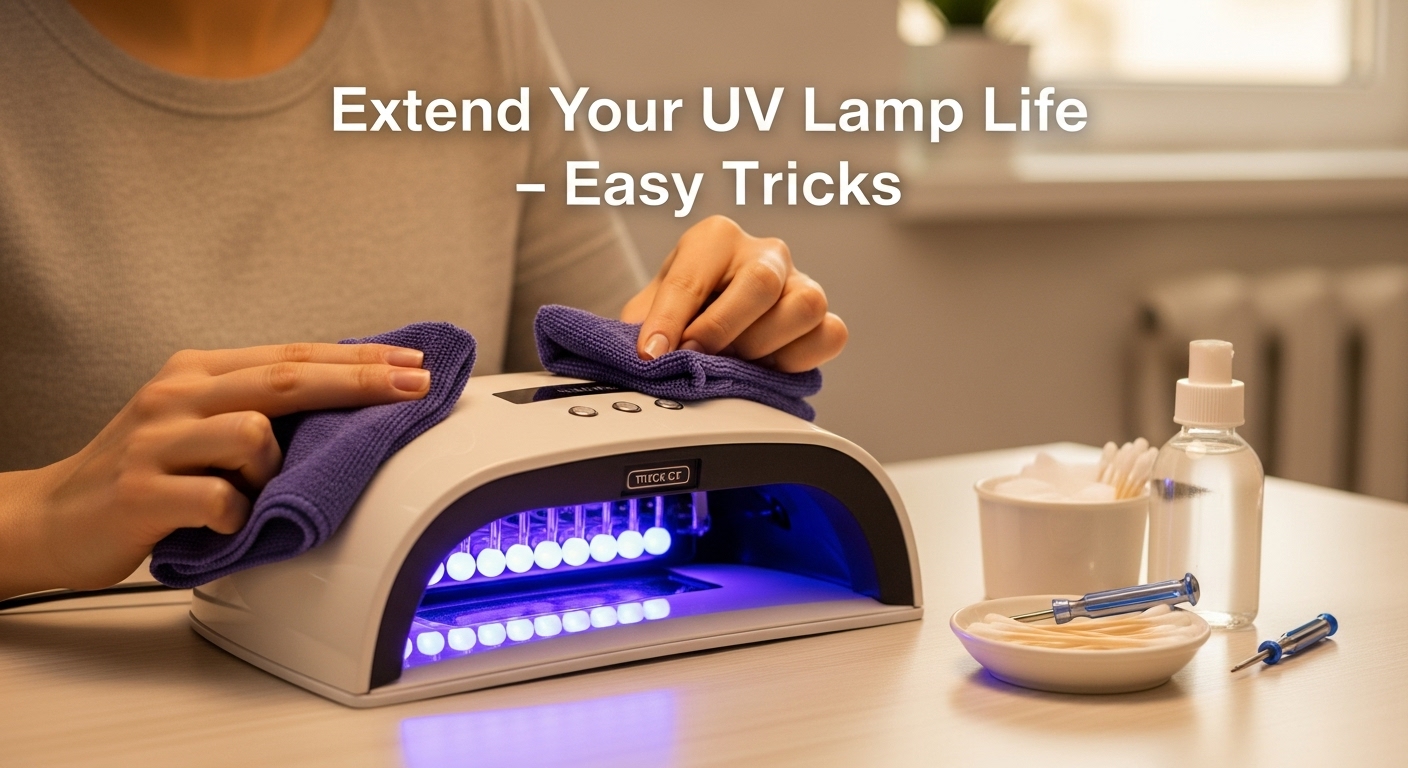
1. Keep Those Lights Clean
Dust and nail product residue are the biggest culprits that can cloud UV lights. Every time you finish a session, wipe the lamp’s surface with a soft, lint‑free cloth. If you notice any stubborn buildup, lightly moisten the cloth with a 50‑50 mix of water and isopropyl alcohol (a common product in most SA pharmacies). Finish by drying the lamp with a fresh cloth. This simple 2‑minute step prevents dimming and extends the bulb’s life.
2. Don’t Overheat Your Lamp
UV lamps love consistency—overheating shortens lifespan and hurts safety. Most models have a built‑in timer or indicators that let you know the lamp is reaching its limit. If you’re using a lamp that shows a “red” warning after 10 minutes, it’s time to switch to a cooler cycle. If you find you’re over‑cooking your gel or acrylic frequently, consider a lamp that offers lower‑energy settings.
3. Match the Lamp to the Polish
Different gels, acrylics, and a range of polish brands require different wavelengths and intensities. A standard quartz lamp works fine for most; however, if you use a brand that says “LED recommended,” switch to an LED‑compatible lamp. The SA market has a number of options: check out the guide on UV nail lamps to find the right match for the products you love.
4. Rest the Lamp Between Sessions
After a long day of loyal service, let the lamp cool for 30–60 minutes before the next client. Continuous operation keeps the light stressed and can cause the quartz or filament to deteriorate faster. A quick cooldown interval is the same that keeping a hair dryer warm before use does for its heated cable.
5. Inspect the Lamp Spare parts
Every few months, pull the lamp out and take a look. If you see any cracks in the glass or a faint, fuzzy tarnish on the metal housing, it’s time for a replacement or a professional cleaning. Do not ignore strange noises or a change in the “glow” the lamp produces.
6. Keep Your Hands Dry and Light‑Dried
Wet fingertips or a wet nail surface creates an extra layer for UV penetration, which increases the heat load on the lamp. Blow‑dry your hands before each client or use a small fan for quick drying. That way the UV energy goes straight into the nail kit, not the lamp’s insulation.
7. Use the Right Voltage
Most UV lamps expected to be used at 220 V in South Africa. Using a different voltage (like 110 V) can cause flickering and reduced life. When you buy a new lamp, double‑check the voltage compatibility: it’s usually listed next to the SKU on the retailer’s page, or you can simply search the model name on best UV nail lamps lists.
8. Stay Updated with UV vs LED Differences
LED lamps often last longer and don’t produce as much heat. If your budget allows, upgrading to a reputable LED lamp can pay off in the long run. An excellent comparison can be found in the “UV vs LED nail lamp” feature. This will give you clarity on which tech suits your workflow.
9. Keep Current on Safety Standards
You’ll find a very detailed discussion on whether UV light is safe for nails here: Is UV light safe for nails? Staying informed helps you adjust your lamp setting seasons or switch to LED if you feel uneasy due to skin sensitivity.
10. Check the Top Mistakes (and Fix Them)
Even seasoned technicians slip into the “top 5 mistakes when using a UV nail lamp” errors. Skipping a cleansing step, using the wrong timer, or exposing the lamp to excessive humidity are all preventable. Read the list here and keep it handy like a cheat sheet.
Bottom Line (But no “Conclusion”!)
The cost of a good UV lamp in South Africa can range from R200 to R1 200, depending on the type and brand. A little extra upfront on a higher‑quality lamp often saves you by keeping it running for 12–18 months or more. Just remember: cleanliness, correct usage, and regular maintenance are your best defence against a cheap, short‑lived lamp. Give these steps a try on your next service, and you’ll see your lamp shine brighter and stay dependable for longer. Happy polishes!