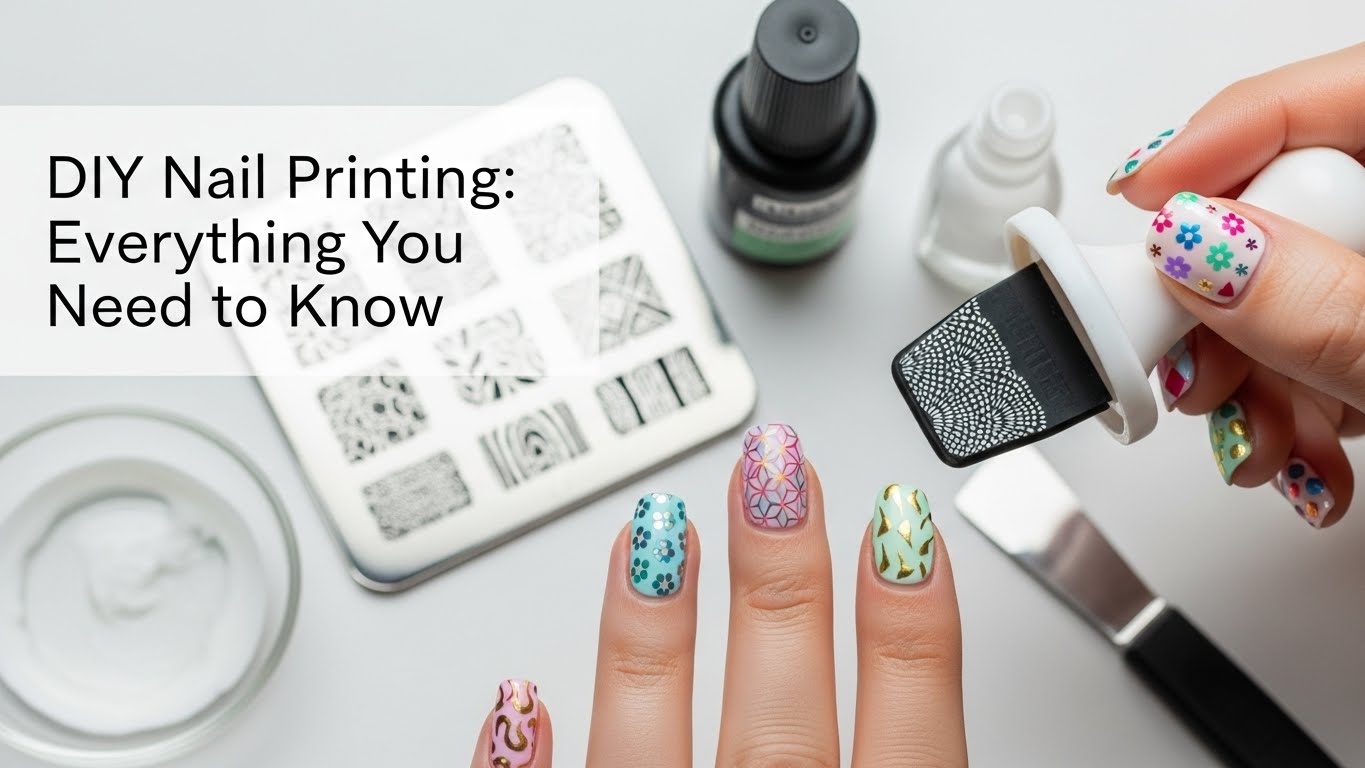
DIY nail printing is a way to get tiny pictures and patterns on your nails at home, without paying salon prices. You use tools like nail stamping plates, stickers, or small nail printers to put the design on top of your nail polish. With a bit of practice, you can print flowers, cartoons, logos and more while sitting on your couch in South Africa.
What is DIY nail printing?
DIY nail printing means making printed designs on your nails by yourself. Instead of a nail tech drawing each line by hand, you use:
- Metal plates with designs (nail stamping)
- Nail stickers or water decals
- A small digital nail printer
- Simple nail art tools, like dotting tools and thin brushes
You still need a base colour (normal polish, gel or acrylic), but the “picture” part is done with these tools, so it looks neat even if you are not good at drawing.
Is DIY nail printing safe?
Yes, if you use proper nail products and keep things clean.
Keep this in mind:
- Use nail-safe polish: Buy polishes meant for nails, not craft paint.
- Check for allergies: If your skin gets red, itchy or starts to burn, wash off the product at once and stop using it.
- Ventilation: Do your nails near an open window. Nail polish smell in a closed small room is not good for your lungs.
- Clean tools: Dirty tools can cause nail fungus or infection.
- Do not print on broken skin: If the skin around your nail is cut or sore, let it heal first.
If you have diabetes, weak immunity, or very damaged nails, talk to a beauty therapist or doctor before doing strong treatments or using glue and harsh removers often.
Different ways to print designs on your nails
There are a few methods. You can mix and match them.
1. Nail stamping
This is the most popular DIY nail printing method.
You need:
- Stamping plates (metal plates with carved designs)
- A scraper (usually a small plastic card)
- A stamper (soft silicone head)
- Stamping polish (or thick, pigmented polish)
You put polish on the plate, scrape off extra, pick the design with the stamper, then press it onto your nail.
Best for: people who want sharp, salon-style patterns without drawing.
2. Nail stickers and water decals
These are ready-made designs printed on thin sticker paper or water slide paper.
You can get:
- Full nail stickers (cover the whole nail)
- Small stickers (hearts, flowers, letters, cartoons)
- Water decals (need to be dipped in water then slid onto the nail)
Best for: beginners, kids, and quick nail art when you are in a rush.
3. Freehand printing with simple tools
You can “print” repeating dots, lines or shapes using:
- Dotting tools (or a toothpick)
- Thin nail art brushes
- Striping tape
It is not printing in the tech sense, but you can repeat a pattern on every nail, so it looks like a printed design.
Best for: people who enjoy a bit of drawing and want custom looks.
4. Mini digital nail printers
These are small machines that print a design straight onto your nail, like a tiny printer.
How it works:
- You paint a white or light base.
- You place your finger inside the machine.
- You choose a picture from the app, or upload your own.
- The printer sprays the design on your nail.
- You seal it with top coat.
They are still quite pricey in South Africa, but more and more salons and home users are getting them.
Best for: tech lovers, small salons, and people who want photo-level detail.
What you need to get started (basic DIY nail printing kit)
You do not need to buy everything at once. Start small and build up.
For nail stamping:
- 1–2 stamping plates (pick simple designs first)
- 1 stamper + 1 scraper
- 1 black stamping polish (it shows well on most colours)
- 1 clear top coat
- Nail polish remover
- Cotton pads and ear buds
- Lint roller or tape (to clean the stamper)
For sticker / decal printing:
- Base colour polish
- Pack of nail stickers or water decals
- Tweezers
- Small bowl of water (for decals)
- Clear top coat
Optional, but helpful:
- Nail file and buffer
- Cuticle oil
- Hand cream
- Latex or peel-off barrier (to protect skin during stamping)
Step-by-step: DIY nail stamping at home
Let’s walk through a simple nail stamping session you can do in your room.
Step 1: Prepare your nails
- Wash your hands and dry them well.
- Gently push back cuticles with a cuticle stick.
- File nails into the shape you like.
- Lightly buff the nail surface so polish grips better.
- Wipe nails with a bit of remover to remove oil.
Step 2: Paint your base colour
- Apply a base coat (this helps prevent staining and chipping).
- Paint 1–2 coats of your chosen colour.
- Let it dry fully. If it is still soft, the stamp can smudge.
Tip: Lighter base colours (white, nude, pastel) make most designs pop.
Step 3: Set up your stamping tools
- Place your stamping plate on a flat surface protected with paper or a mat.
- Keep your stamper, scraper, polish, and remover close.
- Clean the plate with remover to get rid of any oil or dust.
Step 4: Pick your design
Look at the plate and choose a pattern that fits your nail length.
- Full nail pattern (stripes, lace, animal print)
- Small image (flower, heart, star, logo)
Step 5: Apply polish to the plate
- Put one line or small blob of stamping polish on one side of the chosen design.
- Hold the scraper at about a 45° angle and scrape across the design once, firmly but fast.
- The polish should fill the carved parts without leaving a thick layer on top.
Step 6: Pick up the design with the stamper
- Quickly roll the stamper over the design (or press straight down, depending on the stamper type).
- Check the stamper: the design should be clear and full.
If it is patchy:
- Try scraping softer or harder.
- Work faster so the polish does not dry.
- Clean plate and stamper and try again.
Step 7: Transfer the design to your nail
- Line up the stamper with your nail.
- Gently roll the stamper over your nail from one side to the other, or press straight down for some stampers.
- Try to do this in one smooth movement.
If the print lands off-centre, you can clean it off quickly with remover and try again, as long as your base colour is fully dry.
Step 8: Clean and seal
- Use a clean-up brush or ear bud dipped in remover to clean your skin.
- Wait a minute for the stamped design to dry.
- Carefully apply top coat. Float the brush on top; do not press too hard or the design can smear.
- Apply cuticle oil once your nails are fully dry.
Repeat for each nail. It may look messy the first time, but it gets better very quickly with practice.
Step-by-step: Using a mini nail printer
Some home users and small salons in South Africa are starting to use mini nail printers from brands sold on Takealot and other sites. Always read the brand’s own manual, but this is the basic flow.
Step 1: Nail prep
- Shape and clean nails.
- Apply base coat.
- Paint nails in a light, even colour (white is most common).
- Cure under a lamp if using gel.
Step 2: Connect the printer
- Turn on the printer.
- Link it to your phone or tablet with Wi‑Fi or Bluetooth (depends on the model).
- Open the printer app.
Step 3: Choose or upload a design
- Use a built-in design from the app, or
- Upload your own photo (pet, logo, cartoon, your own art).
Make sure the picture is sharp and not blurry.
Step 4: Place your finger
- Put your finger in the hole or bed inside the printer.
- Adjust finger position according to the guide marks.
- Some machines have a camera so you can see where the design will land.
Step 5: Print and seal
- Tap “print” in the app.
- Stay completely still during printing. Even small movement can blur the design.
- Remove your finger, let the ink dry.
- Seal with gel or regular top coat as the brand advises.
Tip: Always use the correct ink and cleaner for your printer. Using random ink can damage the machine or not stick well to your nail.
Tips for long-lasting printed nails
You took time to print those cute designs, so let’s keep them on.
- Always use a base coat: Helps polish grip and protects natural nails.
- Cap the free edge: Run the polish brush over the tip of the nail to seal it.
- Use 2 layers of top coat: One thin coat, let it dry, then another one.
- Avoid hot water too soon: Do not soak your hands in very hot water for a few hours after doing your nails.
- Wear gloves for cleaning: Dishwashing liquid and bleach are harsh on polish.
- Oil your cuticles: Healthy skin around the nail helps prevent peeling.
Common DIY nail printing problems and how to fix them
1. Stamping design will not pick up
- Clean plate and stamper with remover.
- Use proper stamping polish (very pigmented and not too runny).
- Work faster so the polish does not dry on the plate.
2. Design smears when I add top coat
- Wait longer before adding top coat.
- Use a very light touch and float the brush on top.
- Try a water-based or stamping-safe top coat.
3. Stickers keep lifting at the edges
- Make sure your base colour is 100% dry before adding stickers.
- Press the sticker down from centre to edge to remove air bubbles.
- Seal with 2 coats of top coat, especially the tips.
4. Printed design looks too light
- Use a lighter base colour so the design stands out.
- For stamping, choose darker polish.
- For printers, check ink level and quality.
5. Nails chip after one or two days
- Always use base and top coat.
- Avoid using your nails as tools (opening cans, scraping stickers).
- Do not apply very thick coats of polish; thin layers last better.
Where to buy DIY nail printing tools in South Africa
You can find nail printing items almost everywhere now. Always check reviews and make sure products are safe for nails.
Pharmacies and chain stores:
- Clicks
- Dis‑Chem
- Some Game and Edgars beauty sections
These are good for basics: polish, top coat, simple stamping kits, stickers.
Online stores:
- Takealot
- Superbalist (sometimes has nail items)
- Small Instagram and Facebook nail supply shops (look for good reviews)
Here you may find:
- Bigger stamping plate sets
- Special stamping polish
- Nail art printers and ink
- Gel polish kits and lamps
Nail supply stores (in bigger cities):
- Specialist beauty wholesalers in Johannesburg, Pretoria, Durban, Cape Town and other cities
- Some China Malls and flea markets (prices can be lower, but check quality)
If prices are high, start with one or two plates, one stamper, one stamping polish, and a few sticker sheets. You can build your collection over time.
Design ideas for beginners
You do not have to start with Instagram-level art. Try these easy looks first.
Easy stamping ideas
Accent nail only
- Paint all nails one colour.
- Stamp only the ring finger on each hand.
Same pattern, different colours
- Use one stamping plate design.
- Stamp in white on dark nails and in black on light nails.
Half-moon design
- Stamp just on the bottom half of the nail near the cuticle.
Easy sticker / decal ideas
Glitter base + one sticker
- Glitter polish on all nails.
- One small sticker on each ring finger.
French tip with decal
- White tip on all nails.
- Tiny star or heart decal near the tip.
Kids’ cartoon nails
- Plain colour base.
- Small cartoon sticker on each thumb.
Easy freehand “printed” looks
Polka dots
- Use a dotting tool or toothpick and make evenly spaced dots.
Stripes
- Use striping tape or a thin brush to draw straight lines.
Simple flowers
- 5 dots in a circle for petals and 1 dot in the centre.
FAQ: DIY nail printing in South Africa
How long does DIY nail printing last?
- Normal polish with stamping or stickers: 3–7 days, if sealed with top coat and looked after.
- Gel polish with printing on top: 2–3 weeks, depending on your lifestyle and nail care.
Can kids do DIY nail printing?
Yes, but:
- Use child-safe, gentle polish (many brands now make this).
- Keep remover and sharp tools away from small kids.
- An adult should handle machines and sharp metal plates.
Do I need special stamping polish?
You can try normal polish, but it should be:
- Thick, not watery
- Very pigmented (one coat coverage)
For best results, stamping polish is made for this purpose and usually works better.
Are mini nail printers worth the money?
It depends:
- If you run a small salon or often do nails for friends and family, it can be fun and may pay off over time.
- If you only do your nails once in a while, a printer may be too pricey. Stamping plates and stickers give great results for less.
Can I print my own designs at home without a machine?
Yes. Two ways:
Create your own decals:
- Paint clear polish on a plastic sheet.
- Draw or stamp your design on it.
- Let it dry, peel it off, and stick it to your nail with top coat.
Use photo-print water decal paper (for inkjet printers):
- Print small nail-sized pictures on special water decal paper.
- Seal with clear spray as the paper brand tells you.
- Cut, soak in water, and slide onto your nail.
- Seal with top coat.
This takes practice, but it lets you wear designs that are truly your own.
DIY nail printing lets you enjoy salon-style art at home, on your own time and budget. Start with simple tools, take your time to practice, and always put nail health first. With each round, your designs will look cleaner, your prints will last longer, and your nails will start to feel like tiny pieces of art you made yourself.