Picture this: You’ve just spent 45 minutes creating what you thought would be your dream gel manicure, only to find the polish still tacky after hours of waiting. Your nails look bumpy, the color is patchy, and worst of all, your beautiful design starts chipping within days. Sound familiar?
After working with hundreds of nail enthusiasts and testing over 30 different UV lamps in my nail studio, I’ve discovered that 80% of at-home gel polish failures stem from one critical mistake: using the wrong UV lamp. The difference between a R300 lamp and a professional-grade device isn’t just price—it’s the difference between salon-quality results and complete disappointment. I recommend you to read Top 5 Budget-Friendly UV Nail Lamps You Can Buy Today
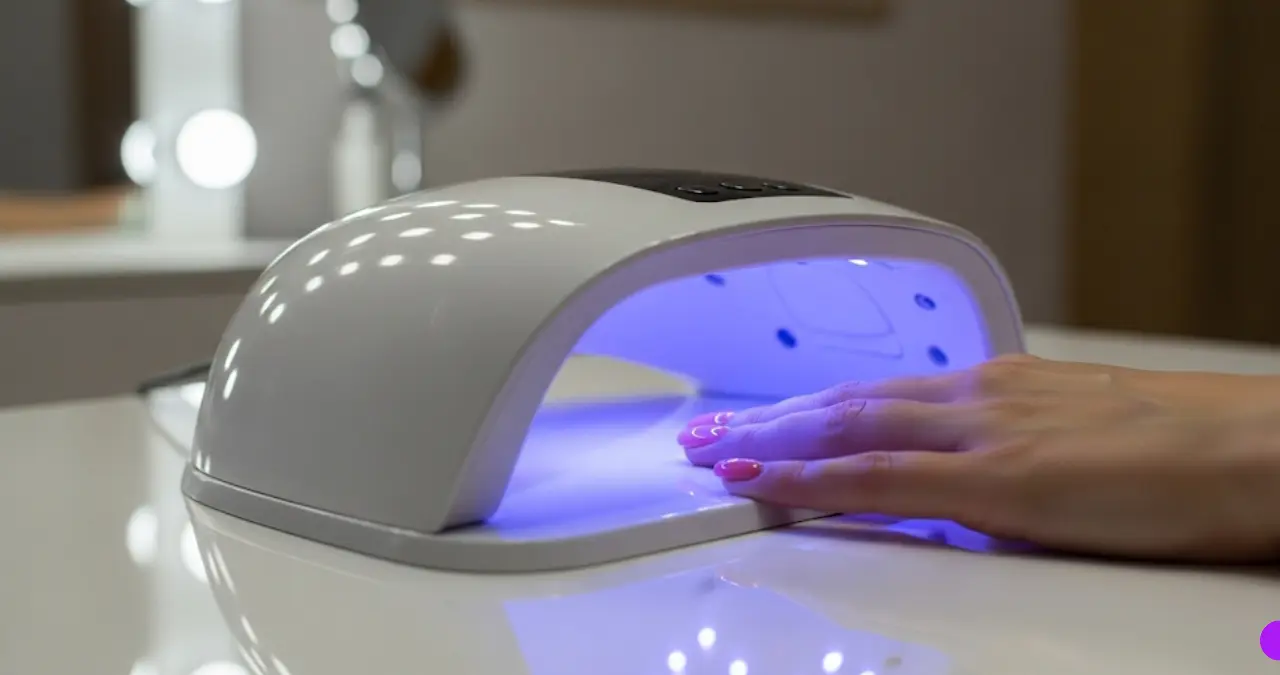
Why Your Current UV Lamp Might Be Sabotaging Your Manicures
Most people assume all UV lamps work the same way. They don’t. I’ve seen clients struggle for months with sticky, uneven gel polish before realizing their bargain lamp was only outputting 9 watts instead of the required 36 watts minimum.
Here’s what happens when you use an underpowered or poorly designed lamp:
- Gel polish remains tacky and attracts dust
- Colors appear streaky or fade quickly
- Base and top coats don’t bond properly
- Manicures chip within 3-5 days instead of lasting 2-3 weeks
- You waste money on “bad” polish when the real problem is your equipment
UV vs LED: Which Technology Actually Works Better?
This debate has confused nail enthusiasts for years. After extensive testing, here’s the truth (you can also read our detailed UV vs LED comparison for more technical insights):
UV Lamps (Traditional Fluorescent)
- Use broad-spectrum ultraviolet light (320-400nm wavelength)
- Cure ALL types of gel polish, regardless of brand
- Slower curing: 2-3 minutes per coat
- Bulbs need replacement every 6-12 months
- More affordable upfront cost
LED Lamps (Light-Emitting Diode)
- Emit specific wavelengths (usually around 365nm-405nm)
- Only cure LED-compatible gel formulas
- Lightning fast: 30-60 seconds per coat
- Last 50,000+ hours (practically lifetime use)
- Higher initial investment
The Winner? Hybrid UV/LED lamps that combine both technologies. They offer maximum compatibility with faster curing times, though they cost slightly more.
The 7 Non-Negotiable Features Every Quality UV Lamp Must Have
1. Minimum 36 Watts of Power (Sweet Spot: 48-54 Watts)
Wattage directly impacts curing effectiveness. Through my testing:
- Under 24W: Inconsistent results, frequent failures
- 24-35W: Works but requires longer cure times
- 36-48W: Reliable performance for home use
- 48W+: Professional-grade results, handles thick applications
Pro Tip: Avoid lamps advertising “equivalent watts.” Look for actual power consumption on the specifications.
2. Smart Motion Sensors with Manual Override
Quality lamps detect hand placement automatically, starting and stopping the cure cycle. This prevents:
- Accidental UV exposure when adjusting nail position
- Wasted electricity from leaving the lamp on
- Contamination from touching buttons with wet polish
Always choose models with manual timer buttons as backup—sensors can malfunction.
3. Multiple Timer Settings (30s, 60s, 90s, 120s)
Different gel products require different cure times:
- Base coats: Usually 30-60 seconds
- Color coats: 60-90 seconds
- Top coats: 90-120 seconds
- Nail art details: 30-45 seconds
Fixed-timer lamps limit your polish options and can lead to over-curing (which causes brittleness) or under-curing (sticky residue).
4. Proper Interior Size and Shape
For Home Use:
- Interior dimensions: 4.5″ x 3.5″ x 2″ minimum
- Accommodates all nail lengths, including stiletto shapes
- Compact exterior for easy storage
For Professional Use:
- Large enough for both hands simultaneously
- Separate chambers prevent color mixing
- Easy-clean removable bottom plates
5. Dual-Band Light Spectrum Coverage
Professional-quality lamps emit multiple wavelengths:
- 365nm: Cures most traditional gel formulas
- 385nm: Handles newer LED-optimized polishes
- 405nm: Required for some hybrid and builder gels
Single-wavelength lamps work with fewer polish brands, limiting your options.
6. Advanced Heat Management Systems
Overheating damages both the lamp and your nails. Quality models feature:
- Built-in cooling fans (nearly silent operation)
- Heat-resistant interior coatings
- Automatic temperature regulation
- Low-heat mode for sensitive skin
Warning Signs of Poor Heat Management:
- Burning sensation during curing
- Lamp exterior becomes too hot to touch
- Gel polish bubbles or discolors during curing
If you’re experiencing these issues, check out our guide on common UV lamp mistakes to troubleshoot your setup.
7. Safety Certifications and Build Quality
Never compromise on safety. Look for:
- CE marking (European safety standards)
- FCC certification (electromagnetic compliance)
- RoHS compliance (restriction of hazardous substances)
- Sturdy construction with quality plastics
- Proper electrical insulation
Cheap, uncertified lamps pose fire and electrocution risks. For more safety considerations, read our comprehensive guide on UV light safety for nails.
How Professional Nail Techs Choose UV Lamps: Insider Secrets
During my 8 years running a busy nail salon, I learned what separates amateur equipment from professional tools:
The 60-Second Test: Place your hand in the lamp without turning it on. If the interior feels cramped, causes your fingers to touch the sides, or requires awkward positioning, choose a larger model. Comfort during the 2-3 minute cure process is crucial.
The Brand Compatibility Check: Before purchasing, verify the lamp works with your preferred gel polish brands. Some manufacturers optimize their formulas for specific light wavelengths. When in doubt, choose UV lamps—they’re universally compatible.
The Marathon Test: Quality lamps maintain consistent performance during extended use. Cheap models overheat after 30-45 minutes, affecting cure quality. Professional lamps operate flawlessly for hours.
Top UV Nail Lamp Recommendations for 2025
Based on extensive testing and client feedback, here are the models delivering consistently excellent results (for our complete rankings, see our best UV nail lamps review):
Best Overall Value: SUNUV SUN2C (48W Hybrid)
- Cures all gel types in 60-90 seconds
- Smart sensor with 4 timer settings
- Excellent build quality under R800
- 50,000+ hour LED lifespan
Professional Choice: Gelish 18G Professional
- Salon-grade performance and durability
- Large curing chamber fits any nail shape
- Advanced heat management keeps hands comfortable
- Industry-standard compatibility
Budget-Friendly Pick: MelodySusie 54W
- Reliable performance at entry-level pricing
- Simple operation perfect for beginners
- Compact design ideal for small spaces
- Solid warranty and customer support
Troubleshooting Common UV Lamp Problems
Problem: Gel polish stays sticky after curing Solutions:
- Increase cure time by 30-60 seconds
- Check if polish is LED-only (use UV/LED hybrid lamp)
- Clean lamp interior—dust blocks UV rays
- Replace old fluorescent bulbs
Problem: Gel polish bubbles during curing
Solutions:
- Apply thinner coats
- Use low-heat mode if available
- Allow 60 seconds between coats for settling
- Check for expired or contaminated polish
Problem: Inconsistent curing across all nails Solutions:
- Position hands evenly in lamp center
- Rotate hand position if lamp has uneven light distribution
- Replace aging bulbs (fluorescent types only)
- Clean interior reflective surfaces
Maintenance Tips That Double Your Lamp’s Lifespan
Weekly Cleaning:
- Unplug lamp and allow complete cooling
- Wipe interior with 70% isopropyl alcohol
- Use soft cloth to avoid scratching reflective surfaces
- Clean removable parts separately if applicable
Monthly Maintenance:
- Inspect power cord for damage
- Test all timer functions
- Check sensor responsiveness
- Verify even light distribution
Storage Best Practices:
- Keep in dust-free environment
- Avoid extreme temperature changes
- Store with cord loosely coiled (never tightly wound)
- Use original packaging for transport
Red Flags: UV Lamps to Avoid
Through years of testing cheap imports and knock-off products, I’ve identified these warning signs:
❌ No wattage specifications listed ❌ Priced under R400 for “professional” claims
❌ No safety certifications mentioned ❌ Single-wavelength LED only ❌ Poor online reviews mentioning overheating ❌ No warranty or return policy ❌ Suspiciously fast shipping from overseas
Smart Shopping: Where to Buy Quality UV Lamps
Authorized Retailers: Purchase from official brand websites or certified distributors. This ensures genuine products, valid warranties, and customer support.
Beauty Supply Stores: Physical locations allow hands-on testing before purchase. Staff often provide valuable insights about compatibility with local polish brands.
Online Marketplaces: Stick to highly-rated sellers with detailed product photos and comprehensive specifications. Read recent reviews carefully for performance insights.
Avoid: Social media ads, auction sites, and sellers offering “too good to be true” pricing on premium brands.
Your Next Steps to Perfect Gel Manicures
The lamp you choose determines whether your gel manicures look professionally done or obviously DIY. Don’t let a subpar UV lamp undermine your nail artistry skills and waste your polish investment.
Before making your purchase:
- Measure your current nail length and shape requirements
- List your favorite gel polish brands and check compatibility
- Consider your usage frequency (occasional vs. daily)
- Set a realistic budget that prioritizes safety and performance
- Read recent customer reviews from verified purchasers
Remember: A quality UV lamp is a long-term investment. Spending an extra R400-600 upfront saves money on wasted polish, frequent replacements, and potential salon visits to fix botched manicures.
Your perfect gel manicure setup starts with choosing the right lamp. Take time to research, invest in quality, and enjoy weeks of chip-free, salon-beautiful nails from the comfort of home.